A ball joint is a spherical shaped bearing that connects the steering knuckles with the control arm. It creates a sort of fulcrum between the steering system and the wheels. That is why it is essential you know how to press a ball joint.
A functioning ball joint can be the difference between an unstable vehicle and a stable one. Often, the ball joint will sustain wear and tear that might make it inefficient in its work.
Therefore, at one time or the other, you will have to press the ball joint. We are glad to tell you that it is a relatively straightforward task. You don't have to get a professional to do it for you.
The Brief of the Ball Joint Press Tools
As much as it could be straightforward removing and installing new ball joints, you will need the help of several tools. Don’t worry; they are all just common tools you can find in your local tools shop. Some you might already have.
So, what tools will you need?
- Rust Penetrant
- Shop Towels
- Tire Iron
- Screwdrivers
- Socket Air tools
- Pickle fork
- Ball Joint Press Kit
- Needle Nose Pliers
- Axle Press
- A Hammer
- Side Cutters
- Extension Wrenches, Ratchet and Torque
Now that you have assembled all you need, let's go about how you can press a ball joint.
Related: Bad Ball Joint Symptoms
How to Press a Ball Joint: Step by Step Guide
Every car will come with manufacturers' recommendations when it comes to replacing some parts. Ensure you follow these recommendations to avoid any problems or damages.
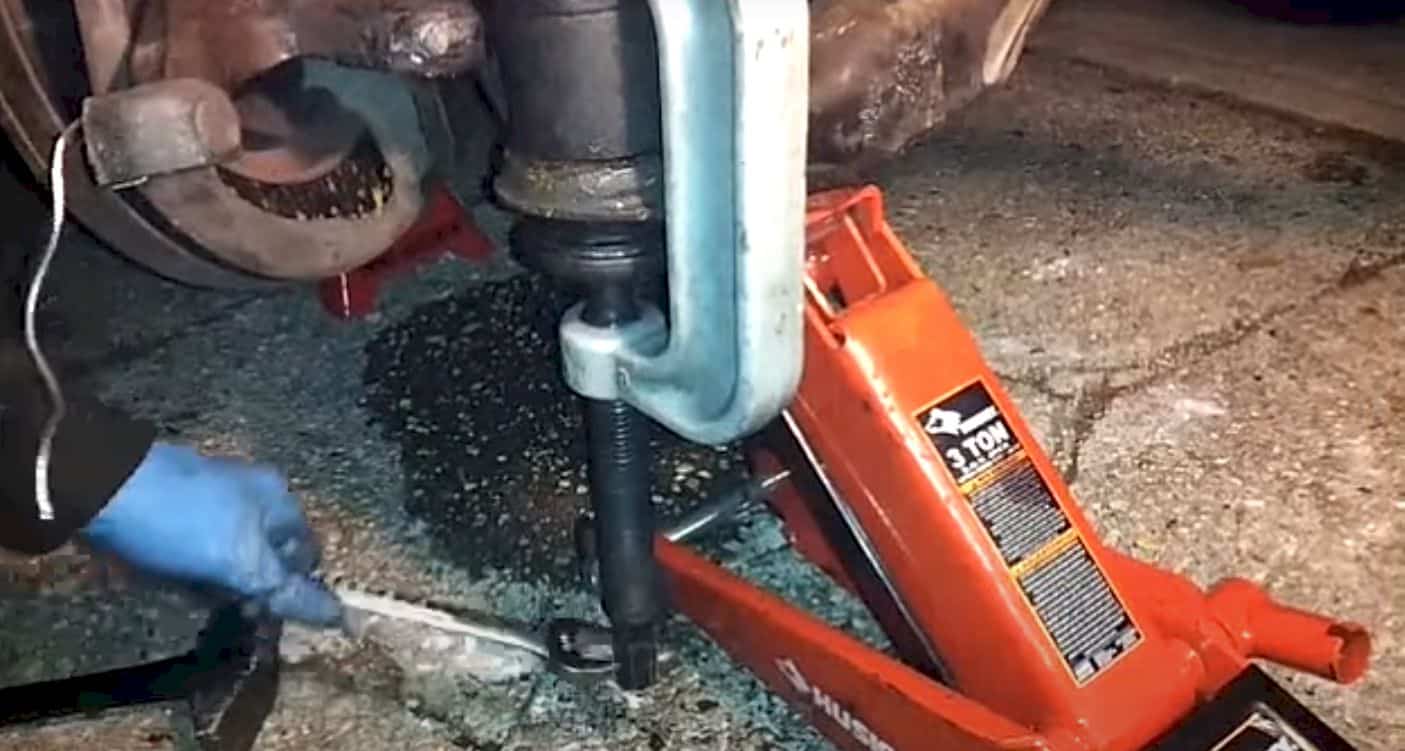
How to Remove a Ball Joint?
- The fastening nut has a cotter pin that holds it in place. Take the side cutters and use them to remove them.
- Then take a socket wrench and remove the fastening nut flowed by the axle nut.
- Gain access to the ball joint by pushing the axle back and then loosening the knuckle assembly
- Use the ball joint separator to disengage it from the lower control arm. A socket wrench will come in handy here. An audible snap will inform you that your efforts to loosen the stud pops from the control arm.
- You will now need to push the axle shaft such that it goes back through the hub assembly. A socket wrench and an axle press will help you get started since the axle may often become dry and thus had to remove. A piece of wood might also come in handy swinging the axle shaft to make it easily pop out. By doing that, you will be able to free up the lower ball joint.
- Remove the knuckle assembly by pushing the outermost CV joint backward through the hub assembly. While doing this, be careful not to interfere with the inner CV joint’s transmission.
- Use the socket wrench to remove the axle press, then remove the strut and knuckle assembly. That will enable you easily access the ball joint.
- Use a screwdriver and a hammer to knock off the wrench rubber boot. Use a shop rag to tidy up the ball joint stud. The new ball joint will have a fresh rubber boot, so you don’t have to worry about the old one.
- Set up the ball joint press. You will have to use adapters specific to your vehicle. Both the upper and lower cones should fit together on the bottom and top of the joint.
- Push out the old ball joint by running the press inwards using your socket wrench and your ball joint press
- Now remove the accessories on top and bottom, which will enable you to remove the old ball joint. Check for any damages during the whole process and if the knuckle assembly is in good shape.
Related: How Many Axles Does a Car Have
How to Replace the Ball Joint
- Ensure you compare the new components with the old ones to ensure they match each other. You don’t want to end up mixing up the parts before replacing the ball joint.
- Put the new ball joint inside the knuckle, ensuring it is level
- Fit the new adapters on the upper part of the ball joint. These adapters will be different from the old ones you removed. Press the joint once you have fitted the adapters. It is essential to press in a uniform manner such that the joint aligns to the center of the knuckle
- Once you are confident that you have correctly and carefully installed everything, use the socket wrench to press the joint further using the press
- When the joints mating surface connects securely with the knuckle, you can now remove the press. Inspect the threads for any damage and check whether the rubber boots are in good condition. Also, check whether you have pressed the ball joint down firmly
- Start replacing the axle shaft on the wheel bearing. Rust penetrant will come in handy here. After that, match the splines inside the hub
- Resecure the new ball joint’s stud and the knuckle assembly to the lowest control arm. You should ensure the axle is appropriately feeding through the. It should poke through the exterior of the hub assembly. After that, add the securing nut and use the socket wrench to tighten it
- Add the cotter pin, then reinstall the axle nut. Ensure you torque it as close as possible to manufacturer specifications
- You can now lower the vehicle as you will have successfully removed and replaced a ball joint
Related: Bad U Joints Symptoms
FAQ
- Can I remove a ball joint without a press?
Yes, you can. It is entirely possible to do that. It will, however, take you a long time to do it. - How dangerous is it to drive without good ball joints?
It is very dangerous. It would be impossible to control the vehicle well and could potentially lead to an accident. - What is the role of the ball joint separator?
The ball joint separator helps you extricate the ball joint from the support arm.
Bottom Line
We hope you now understand how to press a ball joint and how straightforward it can be. Although it will take a few hours of your time, we are sure the satisfaction you will derive from replacing ball joints yourself will be worth it.
Resources:
https://www.mobil.com/en/lubricants/for-personal-vehicles/auto-care/vehicle-maintenance/front-suspension-and-ball-joint-maintenance-for-a-long-healthy-life
https://www.cars.com/auto-repair/glossary/ball-joint/
Simon graduated with a Mechanical and Electrical Engineering Degree. He has over 20 years of servicing experience in both Japanese and German car dealerships. He now acts as a freelance mechanic’s instructor for local schools.